As an Amazon Associate, I earn from qualifying purchases.
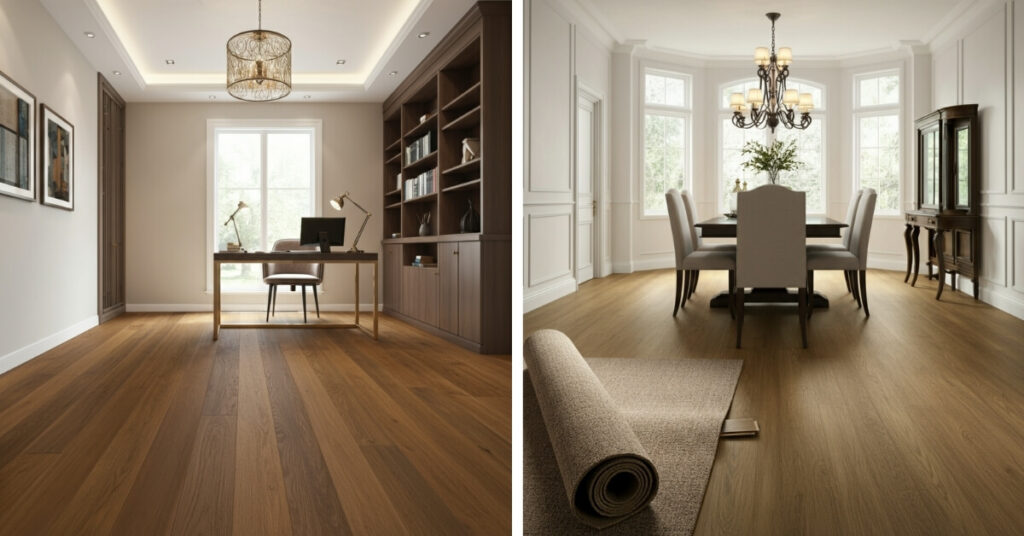
Upgrading your home’s flooring transforms any space dramatically. When you change carpet to wood floor, you improve aesthetics while increasing property value and creating a healthier living environment. This comprehensive guide covers everything you need to know about making this popular home improvement successfully.
Many homeowners find carpet replacement overwhelming. However, with proper planning and the right tools, you can complete this project yourself. Wood flooring offers numerous advantages over carpet, including easier maintenance, better durability, and improved air quality. Additionally, the investment pays dividends through increased home value and long-term cost savings.
Why Wood Floors Beat Carpet Every Time
Health Benefits Make the Switch Worthwhile
Wood floors significantly improve indoor air quality compared to carpet. Unlike carpet fibers, hardwood doesn’t trap allergens, dust mites, or pet dander. Furthermore, wood floors require minimal maintenance through simple sweeping and occasional mopping.
Carpet harbors bacteria and odors that develop over time. Even professional cleaning can’t eliminate all contaminants completely. Therefore, families with allergies or respiratory issues benefit greatly from wood flooring. Additionally, wood surfaces don’t absorb spills like carpet does, preventing permanent stains and odors.
Financial Returns Justify the Investment
Installing wood floors increases your home’s resale value substantially. Real estate experts consistently rank hardwood flooring among the top features buyers want most. Consequently, changing carpet to wood floor represents a smart long-term financial decision.
The initial cost might seem high, but wood flooring pays for itself through increased home value and reduced replacement costs. Moreover, modern engineered wood options provide cost-effective alternatives to solid hardwood. While carpet typically needs replacement every 5-10 years, quality wood floors last decades with proper care.
Planning Your Flooring Transformation Project
Measuring Your Space Accurately
Start by measuring each room’s square footage precisely. Multiply length by width for rectangular rooms, then add 10% extra for waste and potential mistakes. Next, consider room layout and obstacles like closets or built-in furniture carefully.
Create a detailed floor plan marking doorways, heating vents, and permanent fixtures. This planning prevents costly mistakes and ensures you order sufficient materials initially. Furthermore, accurate measurements help you budget effectively and avoid project delays. Use a laser measuring tool for best results, especially in irregularly shaped rooms.
Choosing the Right Wood Flooring Type
Select between solid hardwood, engineered wood, or luxury vinyl planks based on your budget and room conditions. Solid hardwood offers maximum durability but costs more upfront. Meanwhile, engineered wood provides similar appearance at significantly lower cost.
Consider your home’s moisture levels when selecting materials carefully. Bathrooms and basements require moisture-resistant options like engineered wood or luxury vinyl planks. Additionally, factor in your installation skill level since some flooring types install easier than others. Research local building codes too, as some areas have specific requirements for certain flooring types.
Essential Tools and Materials for Success
Required Tools Make Installation Smoother
Gather these essential tools before starting your project: circular saw, miter saw, drill, hammer, nail set, measuring tape, and comprehensive safety equipment. Additionally, rent specialized tools like floor nailers or sanders if your project requires them.
Quality tools make the job easier and produce significantly better results. Therefore, invest in or borrow good equipment rather than struggling with inadequate tools. Safety equipment including knee pads, safety glasses, and dust masks protects you throughout the process. Moreover, having all tools ready prevents frustrating mid-project delays.
Material Selection Determines Project Success
Purchase high-quality underlayment appropriate for your chosen flooring type. Moisture barriers become essential in basements or areas prone to humidity. Additionally, buy matching transition strips for doorways and room borders to create professional-looking results.
Calculate adhesive or fastener quantities based on manufacturer recommendations and your square footage measurements. Furthermore, order finishing materials like baseboards and quarter-round molding to complete the installation properly. Having extra materials prevents project delays when you discover damaged pieces or measurement errors.
Removing Existing Carpet Properly
Carpet Removal Techniques
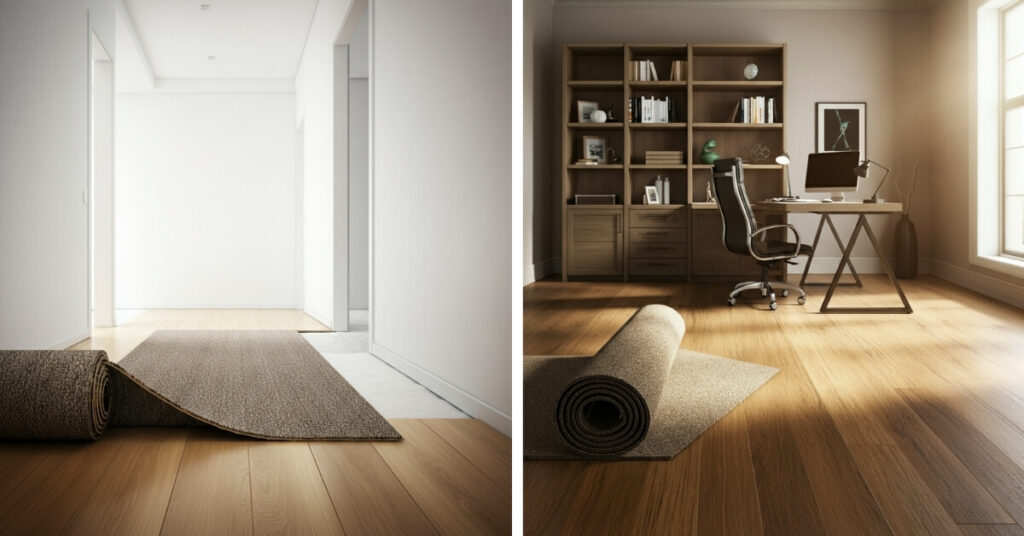
Start removing carpet from one corner and work systematically across the room. Cut carpet into manageable strips using a sharp utility knife for easier handling. Additionally, wear gloves to protect your hands from sharp tack strips and potential debris underneath.
Pull carpet up carefully to avoid damaging the subfloor underneath. Most carpet comes up relatively easily once you get started. Furthermore, roll removed carpet for convenient disposal since most waste management companies accept rolled carpet more readily than loose pieces.
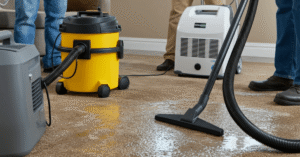
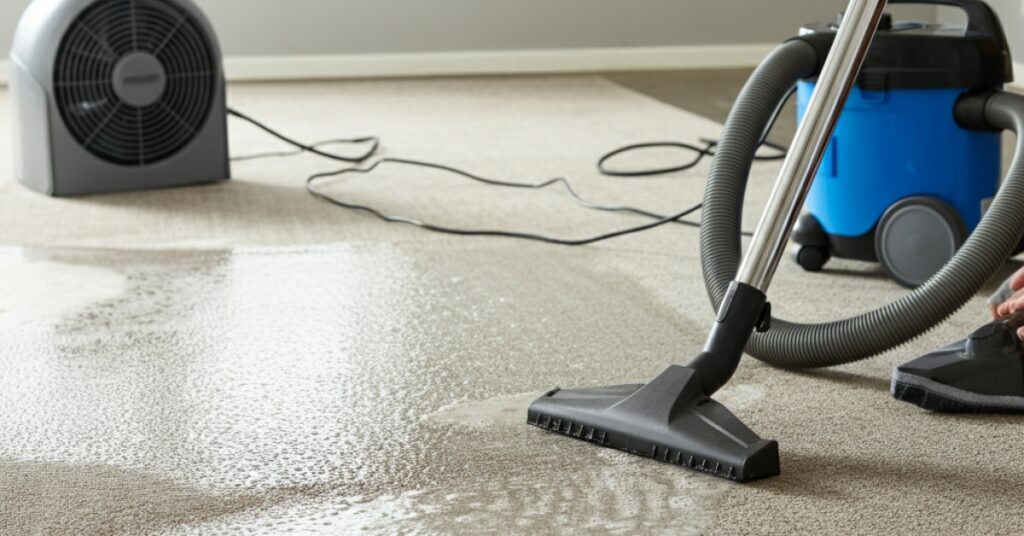
Dealing with Stubborn Padding and Adhesive
Remove carpet padding completely since it often contains adhesive residue that interferes with new flooring installation. Scrape stubborn padding remnants using a floor scraper or putty knife systematically. Moreover, adhesive solvents help dissolve particularly difficult residue effectively.
Clean the subfloor thoroughly after removing all carpet and padding materials. Additionally, inspect for any damage that needs repair before installing your new wood floor. Therefore, address squeaks, loose boards, or uneven areas now rather than after installation begins.
Preparing the Subfloor Foundation
Inspection and Repair Requirements
Examine your subfloor carefully for damage, squeaks, or uneven areas that could affect your new flooring. Additionally, check for proper ventilation and moisture issues that might cause problems later. Use a moisture meter to test humidity levels, especially in basements or areas prone to dampness.
Fix any squeaks by screwing loose subfloor boards to joists securely. Furthermore, sand down high spots and fill low areas with appropriate floor leveling compound. Therefore, taking time for proper preparation ensures your new wood floor installs correctly and lasts longer.
Creating Level Surfaces
Use a long straightedge to identify uneven areas across your subfloor systematically. Additionally, address any dips or rises exceeding manufacturer specifications for your chosen flooring type. Most wood flooring requires subfloor variations no greater than 3/16 inch over 10 feet.
Apply floor leveling compound following manufacturer directions precisely for best results. Moreover, allow adequate drying time before proceeding with installation since rushing this step causes problems later. Furthermore, sand any high spots smooth and vacuum thoroughly to remove all debris and dust particles.
Installing Your New Wood Floor
Starting Layout and First Rows
Begin installation along the longest, straightest wall in your room for best results. Additionally, maintain a consistent expansion gap around room perimeters as specified by your flooring manufacturer. Use spacers to ensure uniform gaps throughout the installation process.
Install your first row perfectly straight since subsequent rows follow this initial line. Furthermore, check for square corners and adjust your starting position if necessary. Therefore, spending extra time on proper layout prevents accumulating errors throughout the installation process.
Continuing Installation Process
Work systematically across the room, maintaining consistent spacing and alignment throughout. Additionally, stagger end joints between adjacent rows by at least 6 inches for structural integrity and better appearance. Use appropriate fastening methods for your specific flooring type consistently.
Check your work frequently using a straightedge and square to ensure accuracy. Moreover, address any problems immediately rather than continuing with errors that compound over time. Furthermore, maintain proper safety practices including eye protection and hearing protection when using power tools.
Finishing Touches and Final Details
Installing Trim and Transitions
Install baseboards and quarter-round molding to cover expansion gaps and create professional-looking results. Additionally, use finishing nails and fill holes with matching wood filler for seamless appearance. Paint or stain trim pieces to complement your new flooring perfectly.
Create smooth transitions between different flooring types using appropriate transition strips. Furthermore, ensure transitions align properly and secure them according to manufacturer specifications. Therefore, attention to detail in finishing work makes your DIY installation look professionally completed.
Final Inspection and Touch-ups

Walk through your completed installation carefully, checking for any loose boards, gaps, or imperfections requiring attention. Additionally, address minor issues immediately while tools and materials remain available. Use touch-up stain or finish as needed for uniform appearance.
Clean your new floor thoroughly using appropriate cleaning products recommended by your flooring manufacturer. Moreover, avoid harsh chemicals or excessive moisture that could damage your new investment. Furthermore, maintain proper humidity levels to prevent expansion or contraction issues with your new wood floor.
Frequently Asked Questions
1. How long does it take to change carpet to wood floor in an average room?
Most DIY installations take 2-3 days for a standard bedroom, depending on your experience level and room complexity.
2. Can I install wood flooring directly over carpet padding?
No, you must remove all carpet and padding completely before installing wood flooring for proper adhesion and stability.
3. What’s the best wood flooring option for beginners?
Engineered wood with click-lock installation systems offers the easiest installation process for first-time installers.
4. Do I need special tools to change carpet to wood floor?
Basic carpentry tools work for most installations, though renting specialized tools like floor nailers can improve results significantly.
5. How much does it typically cost to change carpet to wood floor?
Costs vary widely based on flooring choice, but expect $3-12 per square foot for materials and supplies.
6. Should I hire professionals or attempt DIY installation?
DIY installation saves money but requires time, patience, and basic carpentry skills for satisfactory results.
7. What subfloor conditions require professional attention?
Significant structural damage, major leveling issues, or moisture problems need professional assessment and repair.
8. How do I maintain my new wood floor properly?
Regular sweeping, occasional mopping with appropriate cleaners, and prompt spill cleanup maintain wood floors effectively.
Final Verdict
Changing carpet to wood floor represents one of the most rewarding home improvement projects you can undertake. With proper planning, quality materials, and attention to detail, your DIY installation will provide years of beauty and increased home value. Remember that patience and preparation are key to achieving professional-looking results that enhance your living space significantly. Read more on How Much Does It Cost to Replace Carpet with Hardwood?
Take your time with each step, don’t rush the process, and enjoy the satisfaction of transforming your home with your own hands. Your new wood floor will serve as a lasting testament to your DIY skills and commitment to improving your living environment.
As an Amazon Associate, I earn from qualifying purchases.