As an Amazon Associate, I earn from qualifying purchases.
When water seeps beneath your carpet, the real battle begins with how to dry padding under carpet effectively. Whether you’re dealing with a burst pipe, basement flooding, or a major spill, the moisture that soaks into carpet padding creates a hidden problem that many homeowners overlook. While the carpet surface might appear to dry within hours, the padding underneath can remain saturated for days or even weeks.
This comprehensive guide will walk you through the complete process of drying carpet padding, from initial water removal to final reinstallation. You’ll learn why addressing wet padding is crucial for your home’s health, discover the right tools for the job, and understand when professional help becomes necessary. Most importantly, you’ll gain the knowledge to prevent costly damage to your subflooring and avoid the health risks associated with mold growth.
Taking immediate action when carpet padding gets wet can save you hundreds or even thousands of dollars in replacement costs. However, the process requires more than just pointing a fan at the wet area. Let’s explore the proper techniques that will protect your investment and keep your home safe.
Why It’s Important to Dry Carpet Padding Thoroughly
Carpet padding acts like a giant sponge beneath your flooring, absorbing and retaining moisture far longer than carpet fibers. While carpet might feel dry to the touch within 24 hours, the padding underneath can hold water for weeks if not properly addressed. This creates an ideal environment for problems that extend far beyond just wet carpet.
Mold and mildew development becomes inevitable when padding stays wet for more than 48 hours. These organisms thrive in dark, moist environments, and carpet padding provides the perfect breeding ground. Once mold takes hold, it spreads rapidly through the padding material and can eventually reach your subflooring and wall studs.
Wet padding also poses serious risks to your home’s structural integrity. Prolonged moisture exposure weakens wooden subflooring, potentially causing warping, rotting, or delamination. Additionally, the constant dampness creates persistent odors that permeate throughout your living space, often requiring complete carpet and padding replacement to eliminate.
The health implications cannot be ignored either. Mold spores released from wet padding can trigger respiratory issues, allergic reactions, and other health problems, particularly for individuals with compromised immune systems or existing respiratory conditions. Therefore, thorough drying becomes essential not just for your floors, but for your family’s wellbeing.
How to Dry Padding Under Carpet (Step-by-Step)
Successfully drying padding under carpet requires a systematic approach that addresses both visible water and hidden moisture. Follow these steps carefully to ensure complete moisture removal and prevent future problems.
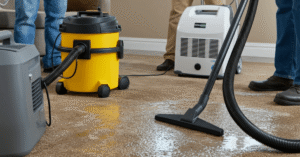
Step 1: Remove Surface Water with Wet/Dry Vacuum
Begin by extracting as much surface water as possible using a wet/dry vacuum. Work systematically across the affected area, making multiple passes to pull water from both the carpet fibers and the padding beneath. Pay special attention to areas where water has pooled, as these spots typically have the highest saturation levels.
Use the vacuum’s upholstery attachment to create better suction contact with the carpet surface. Make slow, overlapping passes, allowing the vacuum time to pull moisture from deep within the padding. Continue this process until the vacuum stops collecting significant amounts of water.
Read Next: Wet Carpet Not Drying
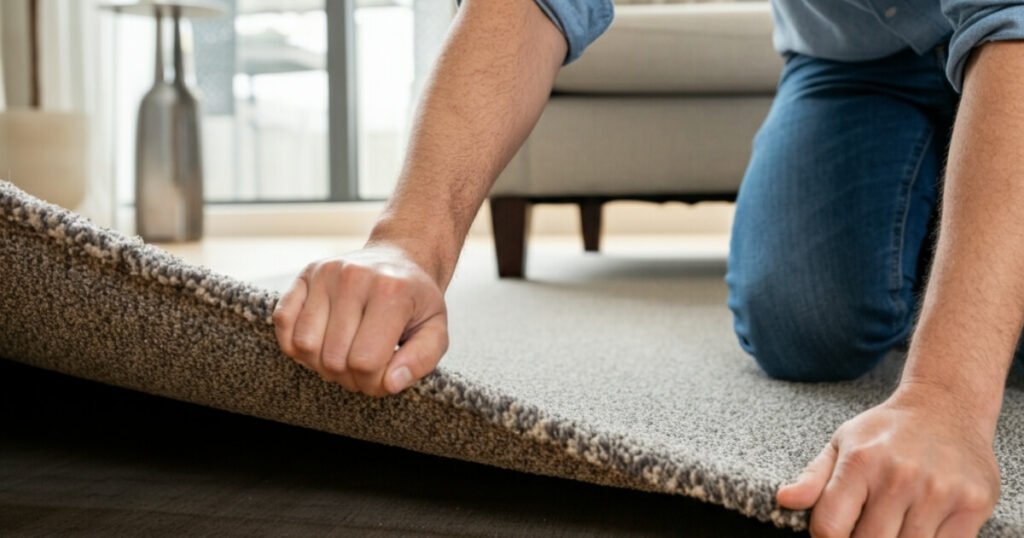
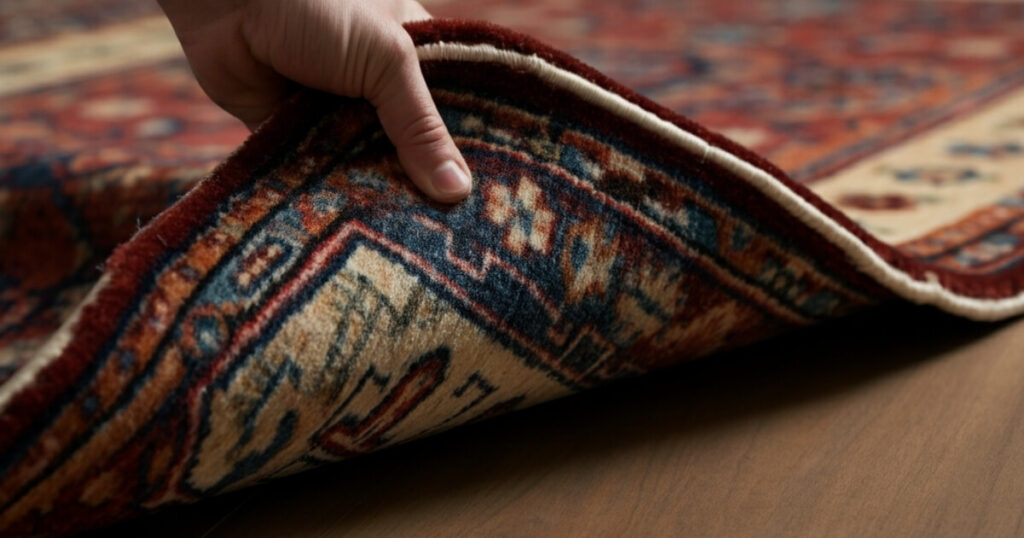
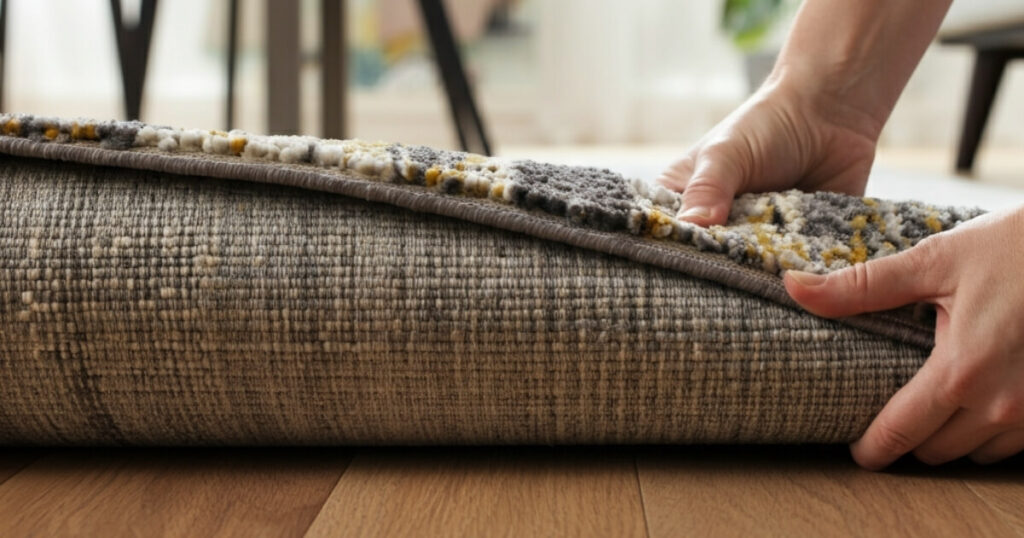
Step 2: Carefully Lift the Carpet to Expose Padding
Once surface water is removed, you’ll need to lift sections of carpet to access the wet padding directly. Start at the corners or edges of the affected area, using a utility knife to carefully cut through any carpet tape or adhesive. Pull the carpet back slowly to avoid tearing, and secure it out of the way using clamps or heavy objects.
This step reveals the true extent of padding saturation. You’ll likely discover that moisture has spread beyond the initially visible wet area, so be prepared to lift more carpet than originally anticipated.
Step 3: Remove and Replace Padding if Saturated
Examine the exposed padding carefully. If it’s completely saturated, squishy to the touch, or shows signs of discoloration, removal becomes necessary. Heavily saturated padding rarely dries completely and often retains odors and contaminants even after drying attempts.
Cut the wet padding into manageable sections for disposal. Remove all staples, tacks, or adhesive residue from the subfloor before installing replacement padding. This ensures proper adhesion and prevents future moisture problems.
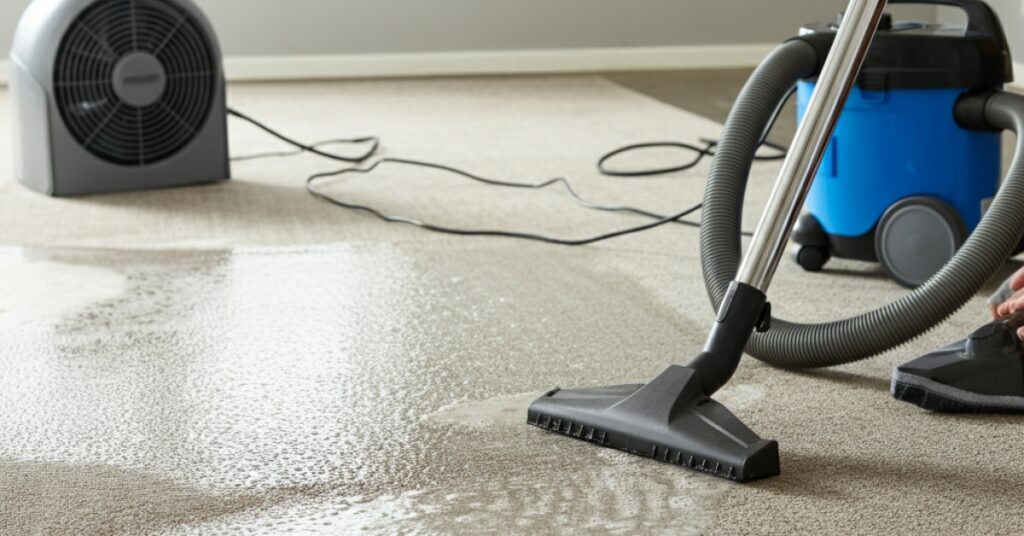
Step 4: Use Fans and Dehumidifiers to Dry the Area
Position multiple high-powered fans around the affected area to create maximum airflow across both the subfloor and any remaining padding. Place fans at different heights and angles to ensure air circulation reaches all surfaces. Additionally, set up dehumidifiers to remove moisture from the air, preventing it from re-condensing on surfaces.
Run this equipment continuously for 24-48 hours, monitoring progress regularly. The combination of moving air and humidity control dramatically speeds the drying process and prevents mold development.
Read Next: Drying Soaked Carpet
Step 5: Sanitize Subfloor and Carpet Backing
Once everything appears dry, sanitize all exposed surfaces to eliminate any bacteria or mold spores that may have developed. Use a solution of bleach and water (1:10 ratio) or a commercial antimicrobial cleaner designed for flood restoration. Apply the solution to the subfloor and carpet backing, then allow it to air dry completely.
This sanitization step is crucial for preventing future mold growth and eliminating odors that might develop later. Don’t skip this process, even if the area doesn’t smell musty yet.
Step 6: Reinstall Carpet Once Fully Dry
Before reinstallation, verify that all surfaces are completely dry using a moisture meter. The subfloor should read below 12% moisture content, and any remaining padding should be completely dry to the touch. Install new padding if the original was removed, ensuring proper alignment and secure attachment.
Carefully stretch the carpet back into position, re-attach it to tack strips, and trim any excess material. Take time to smooth out wrinkles and ensure proper tensioning to prevent future problems.
Best Tools & Techniques for Drying Carpet Padding
Having the right equipment makes the difference between successful moisture removal and ongoing problems. Professional-grade tools work more efficiently than household items and significantly reduce drying time.
A powerful wet/dry vacuum represents your most important tool for initial water removal. Look for models with at least 5-6 horsepower and large capacity tanks to minimize emptying frequency. Shop vacuums with carpet cleaning attachments work better than standard household vacuums for this application.
Air movers or high-powered fans create the airflow necessary for effective drying. Position multiple units to create cross-ventilation and ensure air reaches all wet surfaces. Professional restoration companies often use specialized air movers that move more air volume than typical household fans.
Dehumidifiers remove moisture from the air, preventing it from re-condensing on surfaces as they dry. Choose units rated for the square footage of your affected area, and empty collection tanks frequently to maintain effectiveness. In humid climates or during humid seasons, dehumidifiers become even more critical.
Moisture meters help you verify complete dryness before proceeding with repairs. These tools measure moisture content in wood and other materials, ensuring you don’t seal in dampness that could cause future problems. Digital models provide accurate readings and typically cost less than $50.
For severe water damage, professional restoration equipment may be necessary. This includes truck-mounted extraction units, commercial-grade air movers, and specialized drying mats that can dry padding without removal. While expensive to purchase, these tools are available for rent from many equipment rental companies.
Read Next: How to Dry Out Carpet After a Water Leak
How to Prevent Future Padding Moisture Issues
Prevention strategies can save you from repeating this difficult process. Understanding common moisture sources and taking proactive steps significantly reduces your risk of future padding problems.
Waterproof carpet padding offers excellent protection in moisture-prone areas like basements, bathrooms, or rooms below grade. These products resist water absorption and dry more quickly when exposed to moisture. While slightly more expensive than standard padding, the added protection justifies the cost in vulnerable areas.
Vapor barriers or moisture-resistant underlayment create an additional protective layer between your subfloor and carpet. These materials prevent ground moisture from reaching your padding and provide early warning when leaks occur. Installation requires professional expertise but provides long-term protection.
Regular inspection of plumbing and appliances helps identify potential problems before they cause major water damage. Check washing machine hoses, water heater connections, and bathroom fixtures quarterly for signs of wear or minor leaks. Address small problems immediately to prevent major flooding.
Quick action after spills or leaks prevents minor incidents from becoming major problems. Clean up water immediately, use fans to dry the area thoroughly, and monitor for signs of moisture retention. Even small amounts of water can cause problems if left unaddressed.
Professional waterproofing becomes worthwhile for basements or areas with recurring moisture issues. This might include exterior waterproofing, interior drainage systems, or specialized coatings that prevent moisture penetration. While expensive initially, these solutions provide long-term protection and peace of mind.
Read Next: Carpet Not Drying?
Taking Action to Protect Your Investment
Successfully drying padding under carpet requires immediate action, proper tools, and systematic approach. The hidden nature of wet padding makes it easy to ignore, but the consequences of inaction far outweigh the effort required for proper drying. Mold growth, structural damage, and health risks develop quickly when moisture remains trapped beneath your flooring.
Remember that some situations exceed DIY capabilities. Extensive flooding, sewage contamination, or signs of mold development require professional restoration services. These experts have specialized equipment and experience to handle complex situations safely and effectively.
The key to success lies in acting quickly and thoroughly. Every hour that wet padding remains undisturbed increases the likelihood of permanent damage and costly repairs. However, with the right approach and tools, most homeowners can successfully handle moderate water damage and restore their carpets to safe, dry condition.
Don’t let wet carpet padding become a bigger problem. Start the drying process immediately, follow the steps outlined above, and don’t hesitate to seek professional help when needed. Your floors, your health, and your wallet will thank you for taking decisive action.
Read Next: Way of Drying a Wet Carpet
Frequently Asked Questions
Can wet carpet padding be saved or should it be replaced?
It depends on the saturation level and water source. Lightly damp padding from clean water can often be dried successfully, but heavily saturated padding or contamination from sewage requires replacement.
How long does it take to dry padding under carpet?
Typically 24-72 hours with proper equipment and airflow. Thicker padding, high humidity, or poor ventilation can extend drying time significantly.
What are signs that padding is still wet?
Musty odors, soft or squishy feel when pressed, visible water stains, or moisture meter readings above 12% indicate incomplete drying.
Is it safe to use heaters to dry carpet padding?
No, heaters can create fire hazards and may cause carpet shrinkage. Use fans and dehumidifiers instead for safe, effective drying.
Can mold grow under carpet even if the surface feels dry?
Yes, mold can develop in wet padding even when carpet surface appears dry. This is why proper padding drying is essential for preventing hidden mold growth.
As an Amazon Associate, I earn from qualifying purchases.